Learn the right tactics to carve up your harvested turkey, and you'll serve up something special.
Hunting turkeys is really only half of the job, because cooking a wild turkey can be one of the greatest parts.
But because it's so important, that means carving it up (especially for a holiday feast) is paramount. It's always helpful to go over the checklist of how to carve a turkey before you fire up the oven or smoker the night before.
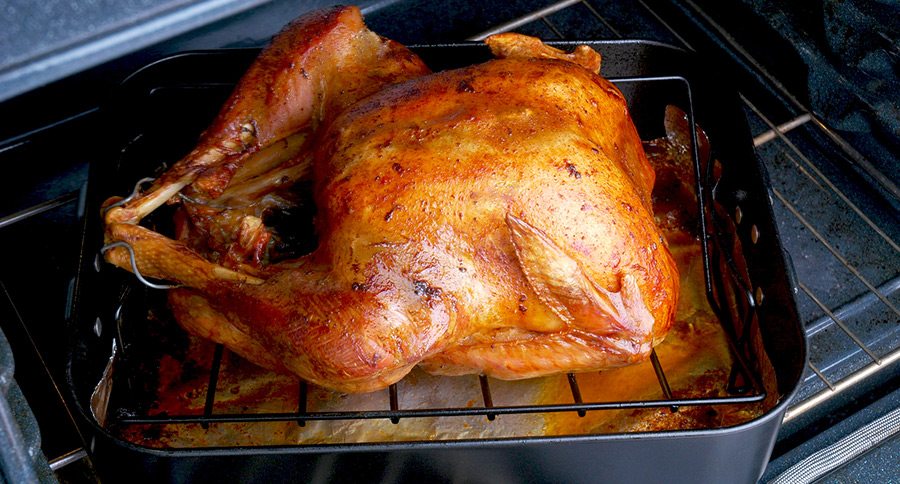
Because your harvested turkey is undoubtedly the star of the show, it's important to treat with the love and respect it deserves when handling it. Whether you're serving roast turkey or grilled turkey, the steps are essentially the same.
Here's our handy guide to help your turkey dinner run as smoothly as possible. Before you begin, you'll need a chef's knife and a boning knife or carving knife.
1. Sharpen your tools
The most important step to carving your turkey actually happens before the bird is even dressed for the oven. However, to ensure that the entire process is a breeze, you have to sharpen your knives.
While some swear by electric carvers for their roast, the best knives you can use are your typical 8-inch chef's knife and a boning knife. A paring knife, though sharp and skinny, is too short to efficiently carve the turkey breast.
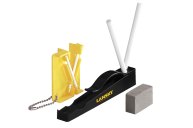
Now is the time to use your knife sharpener. The Work Sharp Combo Knife Sharpener will sharpen any knife you own, whether it's your kitchen, pocket, or hunting knife.
A sharp knife is essential for carving a turkey because you want clean slices in single motions so you don't force excess moisture from the bird during the process.
2. Remove the wishbone
Once your knives are sharpened and you have a few clean kitchen towels on hand, it's time to grab your raw turkey. It's best practice to remove your wishbone before brining your turkey.
Find the skin flap around the turkey neck and look for the wishbone. It will be a long, skinny bone and might trick you into thinking it's a tendon or muscle. The y-shaped bone runs along both breast halves. Using your sharpened paring knife, slice the turkey along the outer edge of the wishbone on one side of the turkey breast. Now, slice along the inner edge of the wishbone on the same side of the turkey breast.
Repeat this step, isolating the wishbone with precise incisions using your paring knife, on the other side of the turkey breast. At the top point of the wishbone, make a horizontal cut above the bone. These incisions are essentially how you'll grip the wishbone to remove it.
Using your index and middle fingers, make a claw shape with your thumb. Grab the top of the wishbone and pry it forward toward you until it gives away and breaks from the bird. It will take some effort, but if it's not moving with a little elbow grease, grab your paring knife and carefully slice the wishbone away.
Your turkey is now ready for roasting. The rest of the steps take place on a fully roasted and rested Thanksgiving turkey.
3. Carve the legs
There are two methods you can use when handling a roasted turkey. You can either grab a clean kitchen towel and hold the turkey in place with your non-dominant hand. You can also use a carving fork or a long two-pronged fork to hold the turkey in place. All that matters is that you're comfortable, have a good grip on the bird, and can maneuver the knife in that position.
With the turkey legs and rear facing you, take your sharp chef's knife and slice through the skin where the thigh meets the breastbone. When you slice through the skin, you should be able to pull the leg away from the body, revealing the joint where the thigh and the hip are connected. Using the tip of your chef's knife, cut through this joint, and in one smooth motion, slice through the rest of the skin to remove the leg from the bird.
Be sure to spot the socket joint where the thigh meets the breastbone. Keep the thigh meat connected to the leg, you'll want a clean turkey breast when all is said and done. Now that you have an entire leg in front of you, let's break this baby down. There is a joint to slice between the drumstick and the thigh you can locate easily by moving the leg naturally.
Repeat the above steps on the other leg so that you are left with two turkey thighs and two turkey legs. Grab your turkey serving platter and place the drumsticks on the platter.
4. Carve the thighs
On one thigh at a time, slice away the large chunk of meat outside the thigh bone with your chef's knife. Repeat steps on the other side of the thigh to remove the bone completely. While you'll be discarding these bones, place them in a scrap pile with the odds and ends of your vegetables for dinner to make a homemade turkey stock that you can freeze for use later.
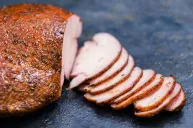
With your thigh meat, slice into pieces of your preferred thickness. Many prefer 1/2-inch thick slices, though some prefer slices to be 1 inch thick. Repeat on the second thigh, and add meat to your serving platter.
5. Carve the wings
It's time to move on to the wings and breast, which means you're almost finished carving. With the turkey in front of you, find the wing joint on the turkey and slice all the way through it with your sharpened chef's knife in one smooth and steady motion. Repeat on the other side.
To break down the wing, remove the drumettes from the flat part of the wing with a chef's knife. Repeat on the other wing, and add the two drumettes and the two wings to your serving platter.
6. Carve the breasts
Using a sharp boning knife, slice through the bird on one side of the turkey breast bone. Separate the meat from the bone by running your sharpened boning knife along the breast bone, going slowly to follow the shape of the bone. As you cut deeper, the breast half will begin to fall away from the turkey. Guide it all the way off with your boning knife, cutting through completely to separate it.
Repeat the above steps on the other side and place the turkey breast on your serving platter. To make a show of your hard work at the table, run your chef's knife along your ceramic honing rod and seamlessly slice through the breast halves at a diagonal. Add the breast meat to your serving platter and pass around the table for your friends and family.
Save your turkey scraps for that homemade stock mentioned earlier, it makes an incredible base for a leftover turkey noodle soup.
For self-harvested turkey recipes and other wild game dish recipes, check out our on-site category page.


