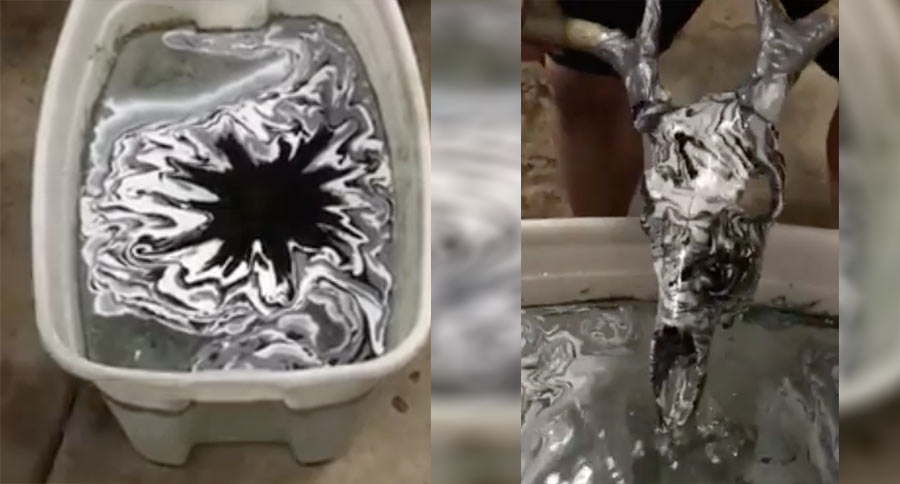
This creative way of preserving your deer skulls is gaining quickly popularity, here's how to do it...
This is a really simple application that produces amazing, creative results when preserving deer skulls. This easy design has rapidly grown in popularity.
This simple method originated from a process known as "hydro-dipping" or "immersion transfer printing."
More recently, bone collectors have been employing a much more simple, practical and cost-effective method.
The first thing you want to do is prep the skull to get the look you're going for. Ideally, the best look is achieved from wrapping the base of the antlers with electrical tape to preserve the natural look, only applying the design to the skull itself.
To produce a more bold design, it's recommended to paint a base-layer of "hammered" spray paint directly onto the skull. The texture will help with the application during the dipping process. Let it dry thoroughly before moving on to the next step.
Fill a tote with water, and gather the colors of oil-based enamel spray paint you want to use for your project. Rustoleum is a good brand to use, but you mainly want to make sure the enamel spray paint is oil based because it will separate from the water and float on the surface.
Spray your colors directly onto the water's surface one at a time at the same centerpoint. The various colors will push the paint previously sprayed into the water to the edges, then it will drift back to the center. Keep doing this a few dozen times, layering contrasting colors to achieve a more bold effect.
Once you have the contrasting colors sprayed into a pattern that covers enough surface area to dip the skull, take something small like a chopstick or skewer and gently swirl the paint from the edges towards the center.
Slowly dip the skull into the paint pattern until you've reached the area you've prepped with tape and the entire skull is submerged. You may have to shift and move the skull to follow the paint as it moves around when you're dipping the skull.
Leaving the skull submerged, use something paddle-shaped like a piece of cardboard to remove the excess paint floating on the surface where you've dipped the skull. Once the surface area around the skull is cleared, you can pick the skull up out of the container, set it aside and allow it to dry.
Although camo patterns are popular, keep in mind to be original and develop your own color schemes. You can match the colors of your favorite sports team in your man cave, or you can choose colors that match the motif of the living room if your spouse has objections to keeping the remains of your kill hung up on the wall.
Also try to keep in mind that you can paint more than just preserving deer skulls. You can use this process to paint your motorcycle body panels or helmets, guitars, gun stocks. The possibilities are endless!
NEXT: EAGLE GIVES DONALD TRUMP A HARD TIME DURING PHOTO SHOOT
WATCH
https://rumble.com/embed/u7gve.v3to3h/


