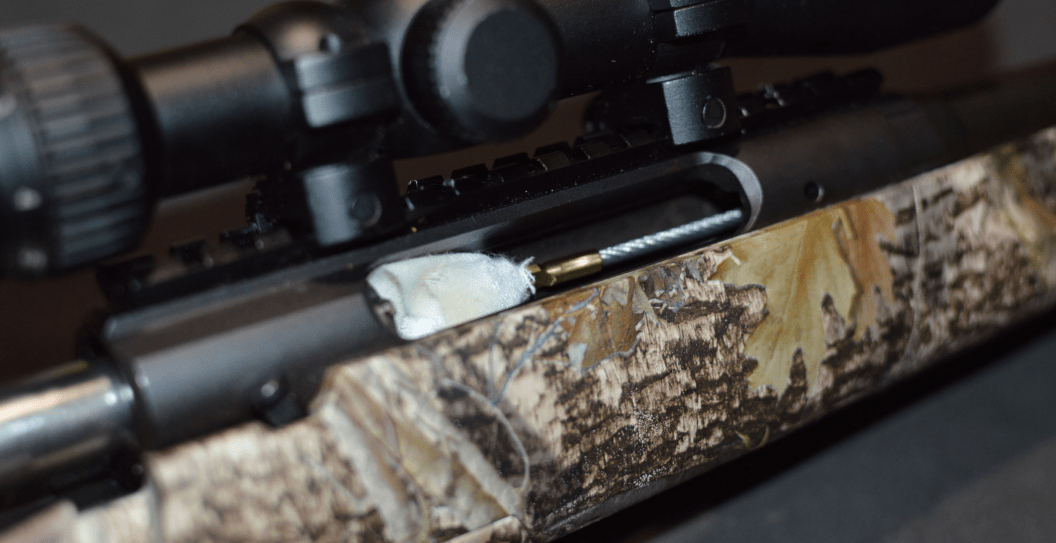
Gun cleaning is an essential element of proper firearm maintenance, especially when it comes to hunting rifles. Owning a gun isn't as simple as taking it out when you're shooting, putting it back when you're done, and then forgetting about it until next time. Guns need care. Without proper care, they lose integrity, meaning they become unreliable, inaccurate and, at worst, dangerous.
As a hunter, I clean my guns at the start and finish of every hunting season I use them, employing a simple process I've perfected over the years. In this story, I'll provide a step-by-step guide for how to clean a rifle. For other types of firearms—such as shotguns, muzzleloaders, and pistols—there will be variations in the process.
Why Do You Need to Clean Your Gun?
Guns mostly get dirty from being shot.
The mechanism of shooting creates an explosion inside the barrel, and that boom leaves behind residual powder and gunk, referred to as "powder fouling." Additionally, "metal fouling" occurs as the metal bullet scrapes down the barrel at high speeds, which leaves teeny tiny bits of metal residue in the barrel.
Both of these types of fouling build up inside the firearm and create problems—mostly by causing a gun to shoot inaccurately. For hunters, that's devastating. There might be only enough time for one shot when the buck of a lifetime steps into view. You had better hope that shot is accurate.
Another good reason to clean your gun: Moisture from the environment can wreak havoc on a firearm. Moisture causes guns to rust both inside and outside. Rust can cause a firearm to not shoot properly, or even to misfire or explode. Other environmental materials—such as dust, sand, or dirt—can get into the firearm's little inner workings, such as the action or trigger mechanism, and cause issues.
Of course, firearms also get dirty on the outside just from being handled. Oil residue from your hands accumulates and makes your gun look sloppy.
A good, solid cleaning will take care of all these issues and make sure your gun stays in good condition for many years.
What to Use to Clean Your Rifle
There are so many gun cleaning products on the market that it can be difficult to know which is the best one to use, or the right one for your particular rifle. (My deer hunting rifle is a Savage Axis .243 Winchester.)
If you don't already have a gun cleaning kit, look for one designed for your specific rifle, or grab a universal kit.
My go-to brand for gun cleaning products has always been Otis. Otis manufactures products that are compact, lightweight, and user-friendly. Otis gun cleaning systems rely on the breech-to-muzzle principle, which cleans residue out in the direction that the bullet travels, literally from breech to muzzle. This is meant to prevent additional fouling from getting deposited into the action during cleaning.
How to Clean Your Rifle
When handling a firearm for any purpose, follow the golden rules of gun safety—which, for anyone needing a refresher, are these: Always keep the gun pointed in a safe direction, treat all guns as if they are loaded, keep your finger off the trigger until you are ready to shoot, and always be sure of your target and what is beyond it.
Prepare your work area:
- Check and make sure your rifle is unloaded before attempting to clean it.
- Lay down a mat or towel on your workbench. This will keep the work area clean and give you a place to set things down. You can also wear gloves to protect your hands from cleaning chemicals.
- Open your rifle cleaning kit, which should include cotton patches (larger patches can be reserved for shotguns, while smaller ones are ideal for rifles); a cleaning cord/cable or rod with an end fixture for the cotton patch (if it doesn't have a cleaning rod, you can use a ripcord); and a cleaning solvent.
The process of cleaning your rifle could seem intimidating at first, but it's pretty simple:
Step 1
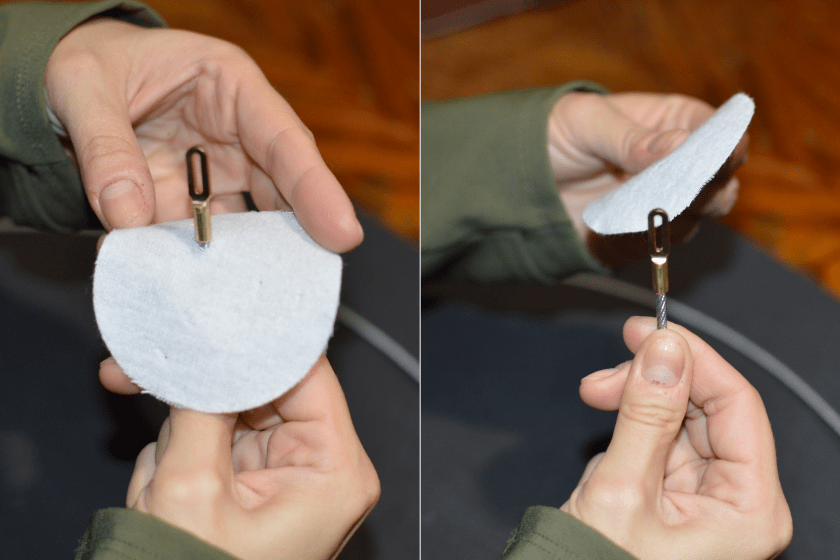
Take your cotton patch and slide it down the cable that matches your barrel length, onto the slotted tip.
Megan Plete Postol for Wide Open Spaces
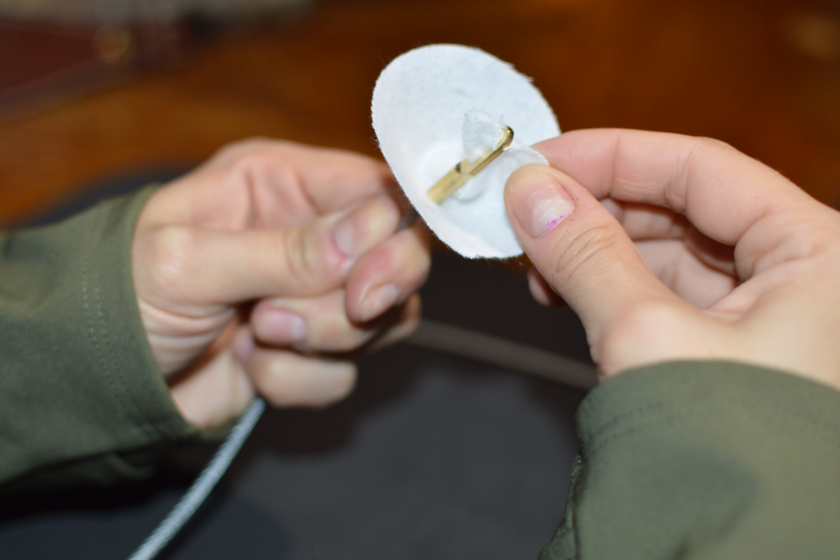
Step 2
Pinch up the patch and then feed that pinched bit back through the slotted tip and pull tight.
Megan Plete Postol for Wide Open Spaces
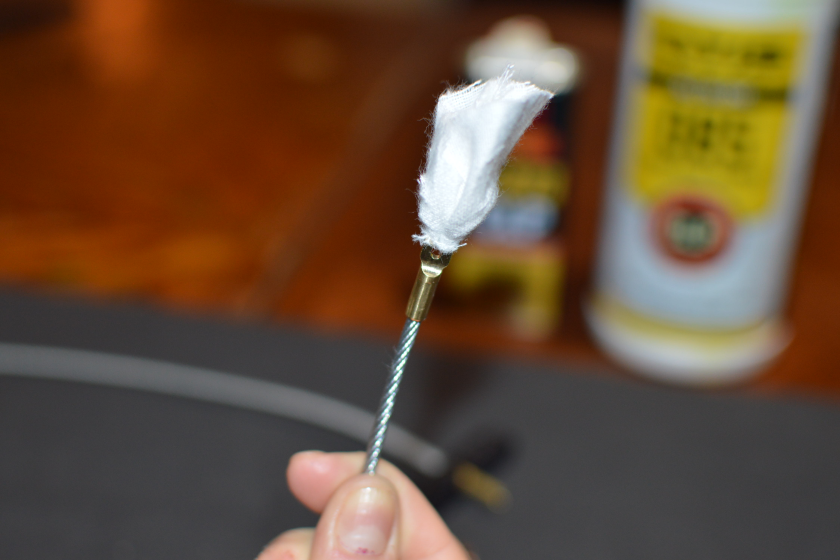
Step 3
Pull the circular edges of the patch up and around the slotted tip. Your patch is now affixed to the cord.
Megan Plete Postol for Wide Open Spaces
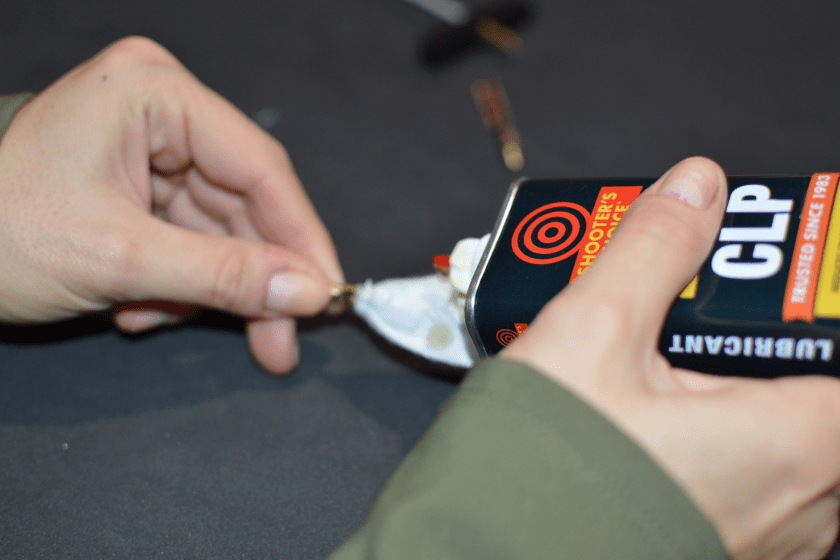
Step 4
Put a few drops of a cleaning solvent (I used CLP) on the patch before feeding it through the breech.
Megan Plete Postol for Wide Open Spaces
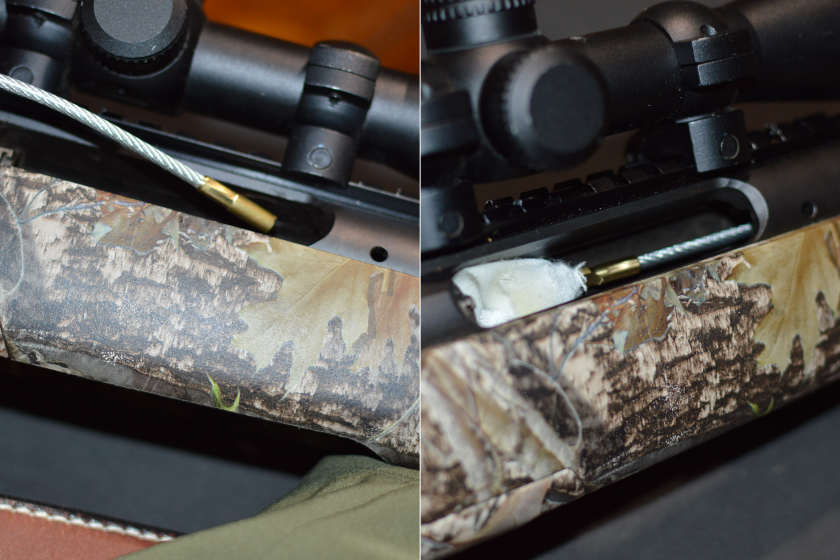
Step 5
Clean out surface residue by sliding the cotton patch through the open breech of the rifle down to the muzzle (where the bullet comes out). Attach the handle and pull the cord through.
Megan Plete Postol for Wide Open Spaces
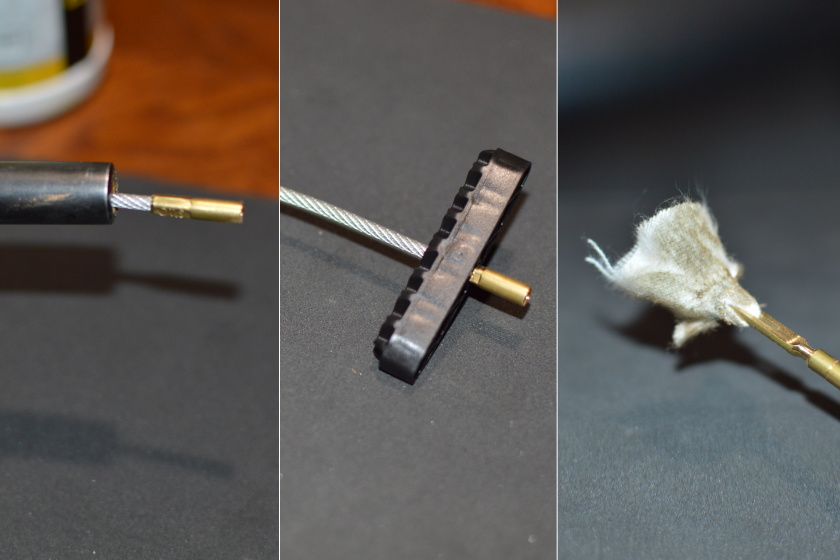
Megan Plete Postol for Wide Open Spaces
Step 6
To loosen any residue stuck to the sides, attach a wire brush end to the cord. Feed that brush through the firearm from breech to muzzle in the same way you did previously with the patch. Pull through.
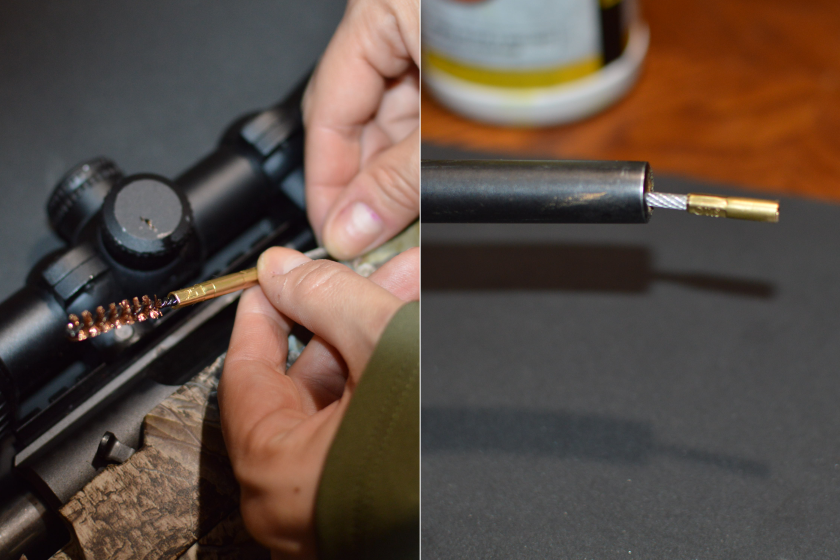
Megan Plete Postol for Wide Open Spaces
Step 7
Fold another cotton patch onto the slotted end just like in Steps 1-3, but this time leave it dry. Run the dry patch from breech to muzzle to remove any remaining residue. If the patch does not come out clean, repeat the process again from Step 1 until the dry patch comes out clean.
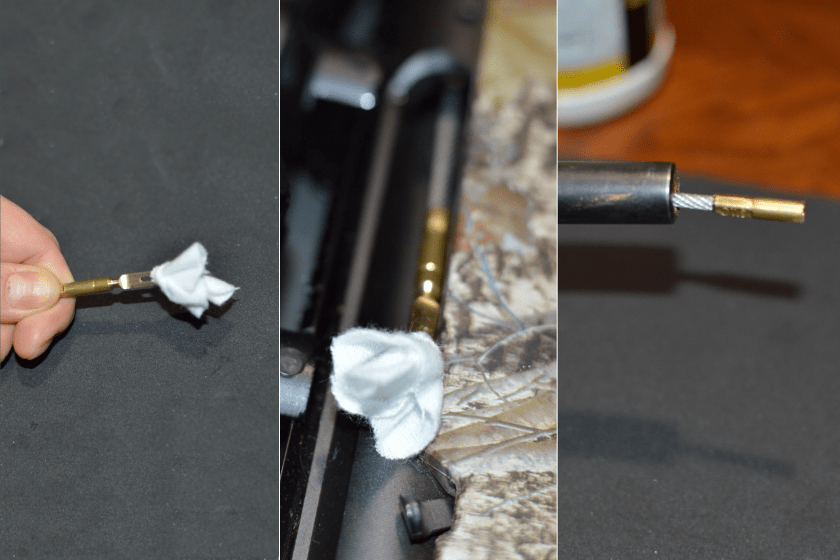
Megan Plete Postol for Wide Open Spaces
Step 8
The final step is to wipe down the exterior with firearm cleaning wipes. Swipe the wipes across the outer surfaces, making sure to clean the nooks and crannies as well. For a bolt action rifle, remove the bolt action and wipe that down as well.
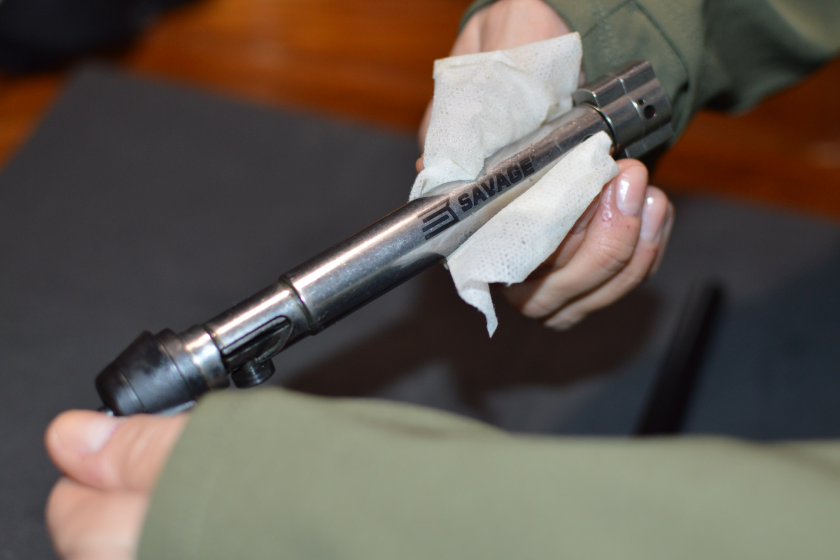
Megan Plete Postol for Wide Open Spaces
READ MORE: The Best .243 Winchester Rifles for Deer and Varmint Hunting
